PartnersLife NZ

Contents
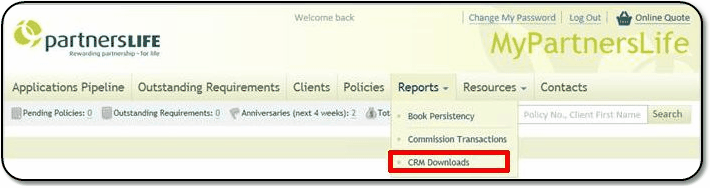
Click on Insurance on the Sidebar Menu. Then click on the small down arrow to the right of the Downloads Icon and Choose PartnersLife.
Overview
All Advisors working with PartnersLife have access to the download.through their web site portal.
If you have any issues with the download to your local computer, please call the PartnersLife's support team for assistance.
Processing The Download
Module Must Be Activated
Before you can process the file downloaded from PartnersLife, your download module must be activated. There is no cost for this, but you must call Tech Support to get a code for your Administrator to activate the download.
Processing
Be sure to remember the location of the file your download from the PartnersLife web site.

The steps to process are highlighted in Red
Step 1: Click on Insurance on the Side Bar Menu.
Step 2: Click on the Arrow next to the download Icon.
Step 3. Choose PartnersLife from the download menu
When you choose PartnersLife, if this is your first download, Advisors Assistant will ask you about archiving the files after processing. It is recommended that you create a PartnersLife folder and tell Advisors Assistant to put them there.
")
Process the Data From Here (Step 4 and later)
Step 4: Retrieve Data Files
After saving the files, use Advisors Assistant to choose the Download File (from the location where you stored it.) On the PartnersLife Download Module click on the Retrieve Files Button.
Once you tell Advisors Assistant where you put the PartnersLife file, it will remember the location. Therefore, you should put it in the same location each time.
Automatically Import Checkbox
If you check this box, Steps 5 and 6 will start automatically without you're having to click on the buttons.
Step 5: Click Import Data Files Button
This will take the data you downloaded from PartnersLife and put it into SQL Server temporary files where it can be validated and processed.
Step 6: Validate and Process Data
This is the processing step that actually adds the names and products to Advisors Assistant.
Automatically Add New Names And Products
This options will tell Advisors Assistant to use duplicate checking and, if the name in the file does not exist in Advisors Assistant, the contact record for the name and associated policy will automatically be added. If the name exists, but the policy number does not, the policy or coverage will be added.
If "Automatically Add New..." is not checked, then Advisors Assistant will add new names and policies into a temporary table for you to make the decision yourself by using the Assign Data Button.
Step 6: Report (VERY IMPORTANT)
It is very important that you at least run the Exception Report so you can see any records with incomplete data, or failed logic tests and were skipped by the download.
Assign Data
When Advisors Assistant cannot determine if the name in the download is already in Advisors Assistant, it will put it in a temporary table so that you can assign the policy or coverage or can decide to add the name.
After downloading and processing, Advisors Assistant can archive them for you by copying them into a folder of your choice.

Check the box and choose a filder
Check the box and choose a folder, or choose Not Now and Advisors Assistant will ask you next time you download. Leave both blank, and you will not be asked again.
|
It's a good idea to archive the files and to take them off site along with a backup of Advisors Assistant (If you are storing the files on your local network. Be sure to use Winzip or some other tool to encrypt the files for privacy. |