Getting Started With Charles Schwab
Schwab Download Overview
Schwab makes several files available for download. Of the available files, Advisors Assistant uses two of them for processing. Other files are downloaded for other operations. Advisors Assistant uses the "Build Files" and the "Transaction Files".
Your First Download vs Daily Downloads
If it is the first time you are downloading from Schwab Data Delivery, you have to do three things:
1.Contact Schwab's Tech Support. Tell them you need the .SLT and .SLB files in your daily download.
2.Install the Schwab Data Delivery Application. This happens automatically if it is not on your computer. Just because it's not on your computer, it doesn't mean you have not used it on another computer. It may already be set up.
3.Set up the Master Accounts and the Destination Folders for your download.
4.Retrieve Your First Set Of Files. This gets you started.
First, let's take a look at the daily process AFTER you have done the initial setup.
For details on the daily processing, after you have done the steps below, see the Schwab Daily Processing Topic.
Installing And Setting Up Schwab Data Delivery Software
To do your first download, please follow these steps:
Step 1: Login
Login as shown in Schwab Screen 1 in the Daily Processing Section by logging into the web site. You will not have the icon on your desktop.
Step 2: Choose Data Delivery From The Tools Menu
Click on Tools | Schwab Data Delivery | Launch Schwab Data Delivery
Step 3: Begin Schwab Data Delivery Set Up
If you have not previously installed Data Delivery, the web site will detect this and start the download and the setup process. You will see the Introduction Screen.
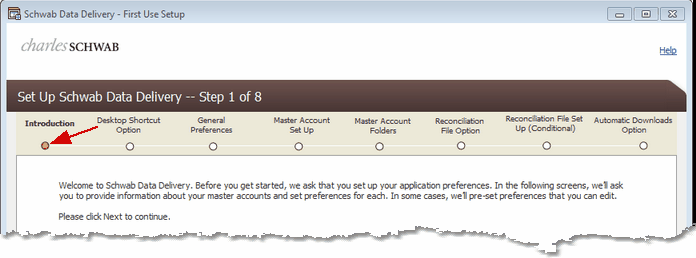
Schwab Screen 4: Setup Introduction
Read the screen and click Next at the bottom of the screen. The red arrow shows which step in the process you are currently using.
Step 4: Desktop Icon
If you choose "Yes" to put the icon on your desktop, you will be able to start the download process with a click on your desktop.
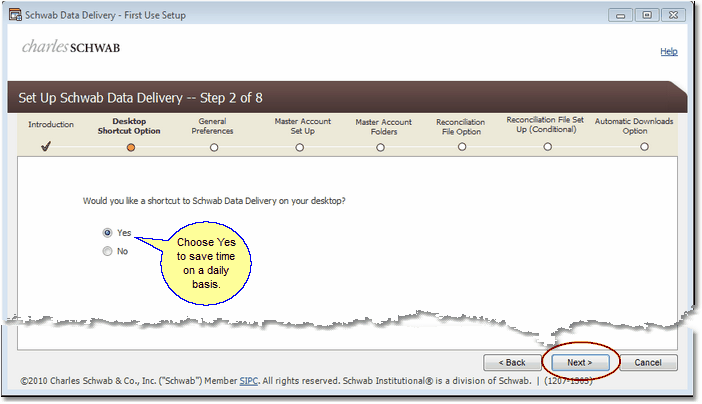
Schwab Screen 5: Install Desktop Icon
Step 5: Choose The Default Download Folder
The default folder will have the master account number added to it, so it is only the first part of the download folder names. Each master account will end up in a sub-folder just below the master folder.
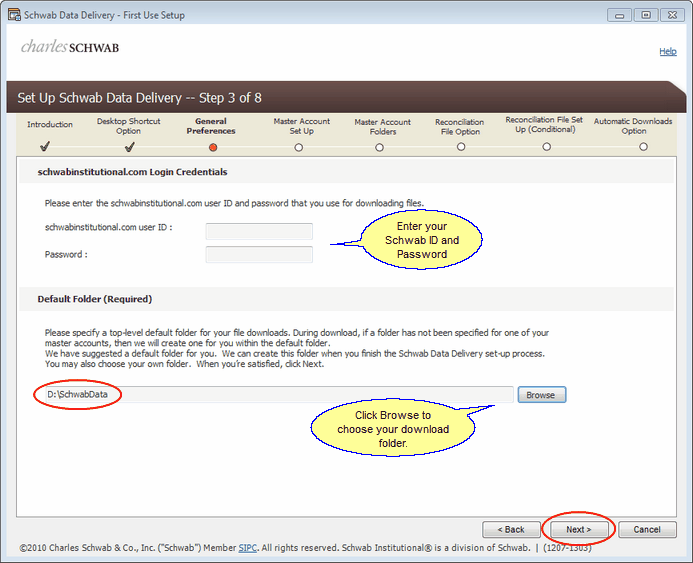
Schwab Screen 6: Setting Up The Default Folder
If your master account is 12345678 and your default folder is D:\SchwabData, then the files for that master account will go into a folder called D:\SchwabData\12345678.
It's a good idea to keep the name simple and off the root of the drive you want to use. "Schwab Data" or "SchwabData" is a good choice.
Click the Browse Button to either navigate to the folder or to create the folder you want to use.
Step 6: Master Account Setup
This is the step where you add master accounts to your download. When you first get to this screen, the list of accounts will be blank, so you use the Add Master Account Button to add accounts to the list.
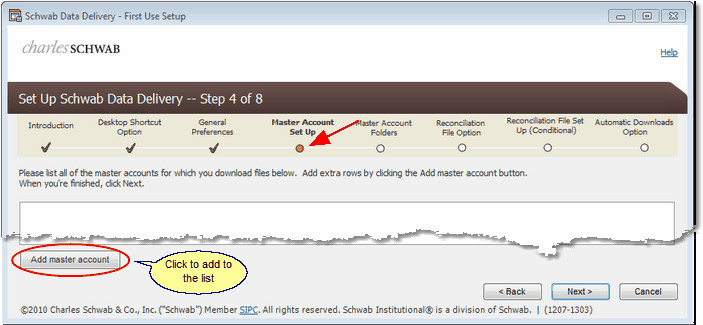
Schwab Screen 6: Add Your Master Accounts To The Download
Once you have added each of your master accounts, and assigned descriptions as shown on the screen below, you are ready to tell the Data Delivery software where to place them on your local computer.
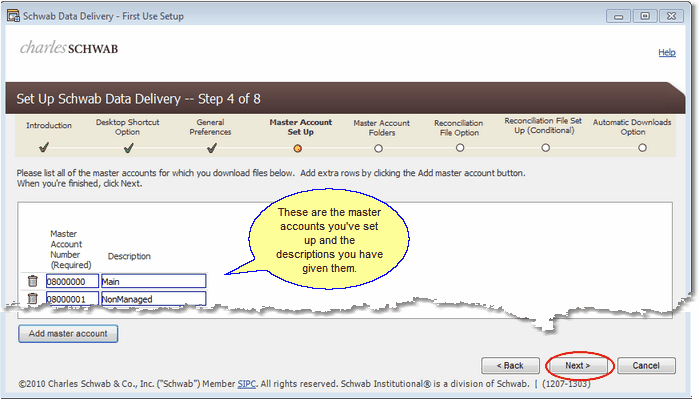
Schwab Screen 7: Master Accounts Set Up
Click the Next Button when all of your accounts are set up.
Step 7: Assign Download Folder
The screen below will show you where each account will download to on your local computer. You can customize each account's location, but there is usually no reason to do this.
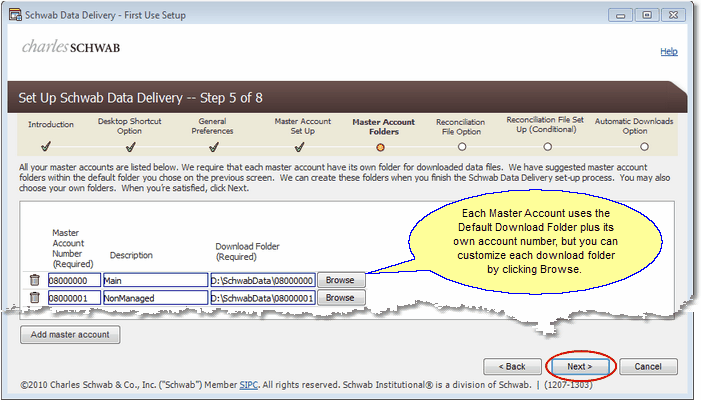
Schwab Screen 8: Each Master Account has its own download location
Normally, you would just click next on the screen shown above. If different accounts are assigned to different advisors, you could use the Browse Button to append the advisor's name to the folder.
Step 8: Reconciliation File Option
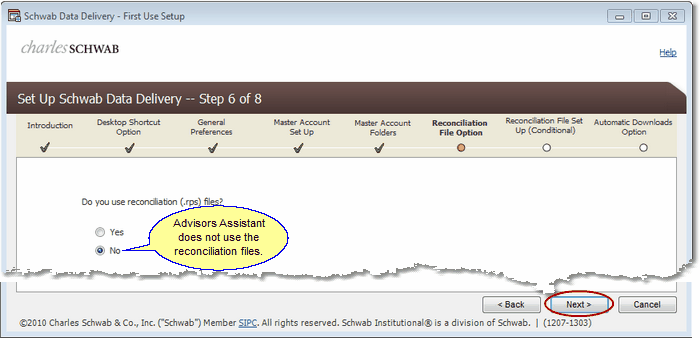
Schwab Screen 9: Choose No For Reconciliation Files
Since Advisors Assistant does not use the reconciliation files, select "No" and then click Next.
Step 9: Automatic Download Option
Technical Support does not suggest that you use automatic downloads for individual advisors. Several things can go wrong. These include the fact that if all the files are not ready, due to heavy processing demands on the Schwab computers, you may receive only a partial download.
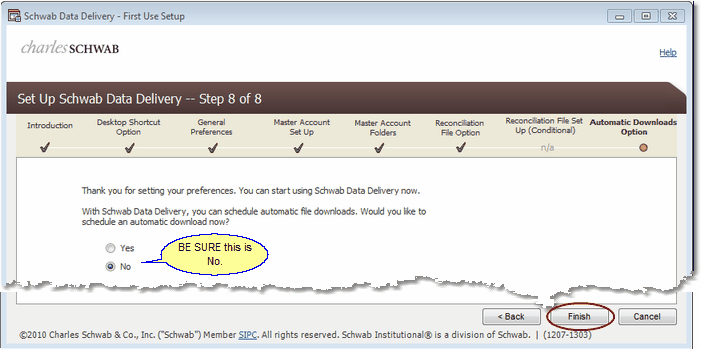
Schwab Screen 10: Do Not Choose The Automatic Option.
This automatic option is designed for other than individual advisor offices. Be sure this option is set to No and then click Finish.
Step 10: Download Your First Set Of Files
You are now ready for your first download to initialize the download system.
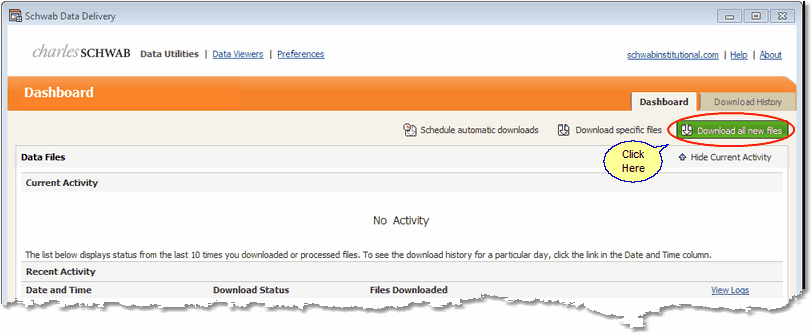
Schwab Screen 11: Getting Your First Set Of Files
Click on the green button to get your files.
Step 11: Choosing File Types
Next, you choose the file types for this first download. Advisors Assistant uses two of the file types that are available. You can check other types, but they will be ignored.
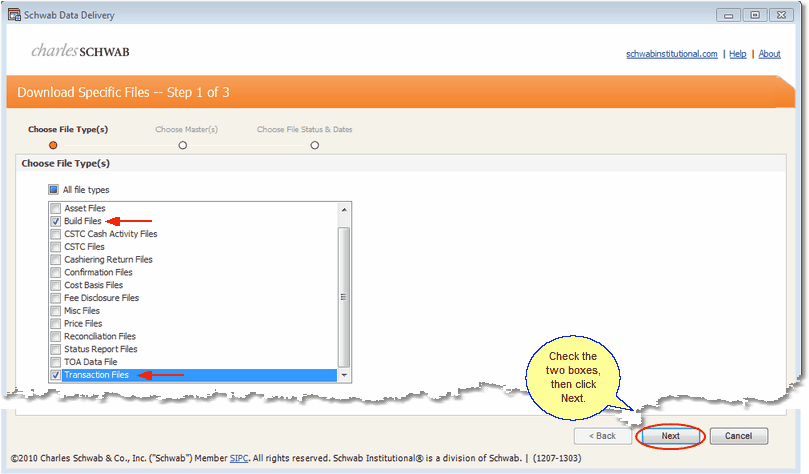
Schwab Screen 12: Choose The File Types For This Download
As shown on the screen above, check the Build Files and the Transaction Files.
Your daily downloads, shown on Schwab Screen 3 in the Schwab Daily Processing Section, download all of the types automatically, but we only use the two shown above.
Step 12: Choose Masters For This First File Set
You will now see a list of the Master Accounts you set up in Step 6. Normally you would download all of the Master Accounts.
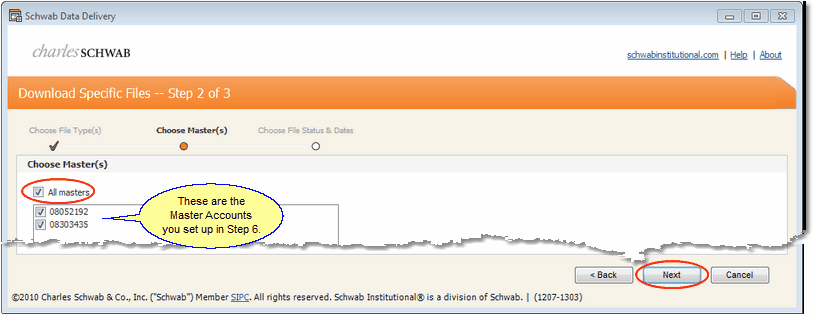
Schwab Screen 13: Choose the Master Accounts
Click on "All Masters" and then click on the Next Button.
Step 13: Date Range For Files
This screen gives you a chance to download previous history. By choosing Date Range on this screen, you can go back and get historical files.
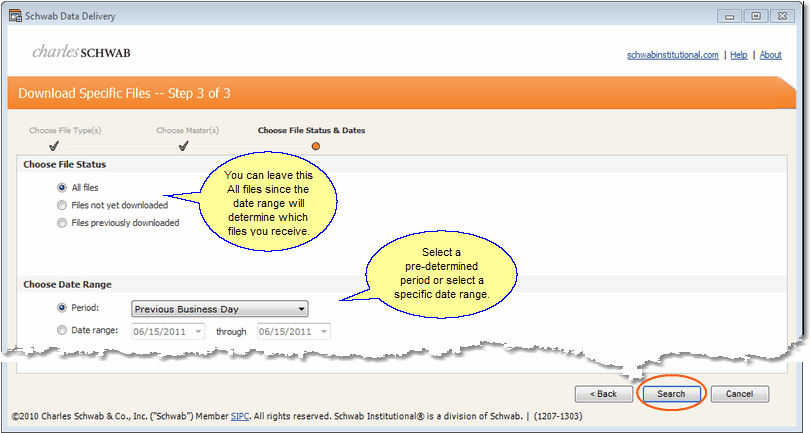
Schwab Screen 14: Select Which Days' Files To Downlaod
Click on the Select Button to start the selection process.
The web site will let you go back 3 months at a time.
On Schwab Screen 3, there is a Specific File Option next to the Green Button. This also puts you into a set of screens that will allow you to download history.
Note: If you download many master accounts and several weeks at the same time, you could run out of memory on your station. We recommend processing only one Master Account at a time and one month's files at a time. Be sure you back up Advisors Assistant before processing the files.
Reconciling & Historical Files
If you are going to process your historical files, process the oldest files first and work your way forward After your first block of files, the system will reconcile to the position in that first download. If you process new files to old files, you will a reconcile with each block of downloads, but old to new will produce far fewer reconciles.
Step 14: Download The Selected Files
After the server selects the files for you, the screen below will show you the list of files. It is this list that will be moved to your local computer.
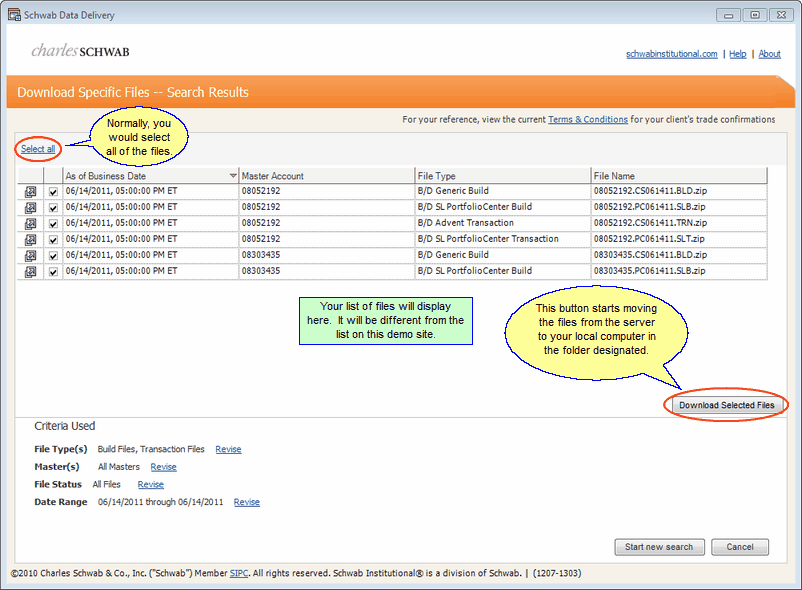
Schwab Screen 15: Begin Download
Click on Download Selected Files to begin the transfer. The time will depend on your internet connection.
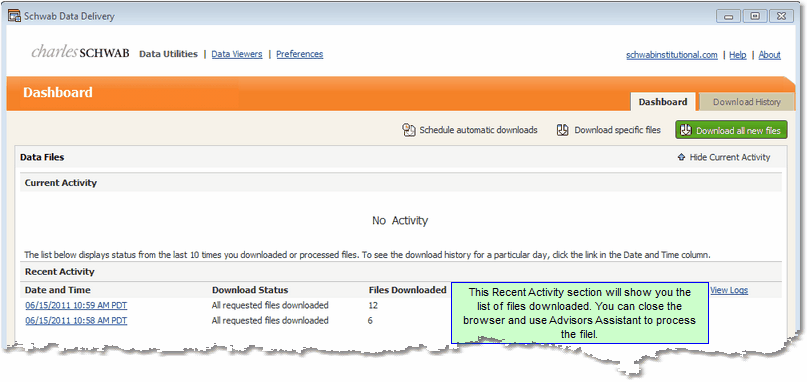
Schwab Screen 16: After They Are Downloaded The Files Are Recent Activity
When you see the files on this screen, they have been downloaded and you can exit the browser and process the download into Advisors Assistant.
See Also
