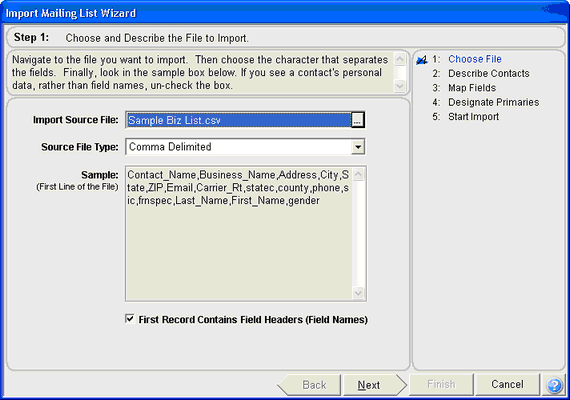
Import List Wizard Page 1
Click on Admin, Contact List Import & Maintenance. From the Mailing List Screen click the Import List Button. To begin importing a list, from the Admin Menu select Maintain Mailing List.
Import Mailing List Wizard Overview
The Import Mailing List Wizard takes you through the steps of importing a mailing list into Advisors Assistant.
You can follow your progress through the Wizard on the right side of the screen, where the steps are listed out.
Import Mailing List Step 1: Choose the File
Step 1 of the Import Mailing List Wizard has you select the file that you will be importing, and the type of file that is being imported.

Import Source File
Click the Browse Button (![]() ) to select the file you wish to import from your computer or network.
) to select the file you wish to import from your computer or network.
Examples
Mailing List.csv
Business List.txt
Contacts.dat
Source File Type
Select if the names in your list are separated (delimited) by commas, or tabs. If your list has an extension of .csv, select the CSV option (which is a comma separated file.) If you do not know how your list is separated do not import the list - contact the vendor from which you received the list.
First Record Contains Field Headers
Advisors Assistant needs to know if the first record in the list you are importing has the names of the fields, or is an actual contact name. To help you determine this, the first record in the file you selected is shown in the Sample Box.
If you see field names in the Sample box (ie. First Name, Last Name, Home Phone) keep the box checked. If you see names in this box (John, Smith, 805-555-9999) uncheck the box labeled "First Record Contains Field Headers."
Click Next to move to Step 2.
See Also
