Adding / Editing Organization Contacts
From the View Contact Screen, click on the ![]() Icon. Use the Change To Organization Button at the bottom of the Create New Contact Screen to change the screen to an Organization Contacts as needed.
Icon. Use the Change To Organization Button at the bottom of the Create New Contact Screen to change the screen to an Organization Contacts as needed.
Overview
Contacts are added as Individuals or Organizations. For more on the difference between Individuals and Organizations, click HERE.
To add or edit contact information, you must have the security rights. These are provided by your database administrator.
Drop Down Lists
When you see the Down Caret ![]() it means that a list is dropped down to choose the input. Lists can be edited from the desktop application if you have the security rights to edit lists.
it means that a list is dropped down to choose the input. Lists can be edited from the desktop application if you have the security rights to edit lists.
Screen Element Heading
Screne Element Text
This is a note that, when filled in, will place the red Alert Icon on the Main Screen. Clicking on the Icon will show the note.
The note should be short, just a few paragraphs.
The note can be used to point out when a family member has had a traumatic event or a congratulatory event. Recent deaths, divorce, illness and even a marriage may qualify.
If the note it to expire, put in a line at the end, "Remove after xx/xx/xxxx so that anyone reading it after that date can remove it.
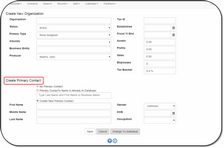
You can associate this organization with a primary contact which will make it easy to know who controls your accounts.
When creating the Primary Contact, you only add a few fields here. You should navigate to the contact's record to fill in the details.
Change To Individual Button
If you are entering an Organization's Information, click on this button to change the input screen to one designed for Individuals.
See Also
|
When entering an organization's name, if it is a joint account, enter the last name first, such as Smith, John and Jane. This makes it much easier to locate by last name. |


