What To Do First

Contents
After installing the Red CD (at the Document Server) and the Blue CD on each station(s), you should do the following:
Step 1: Check The Connection To The Document Server
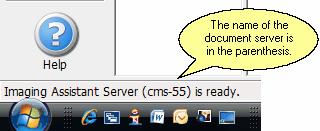
The Imaging Assistant Scanning Program shows the name of the server at the bottom left of the screen. If it shows as Ready, then you are connected.
Click on the Scan Icon on the Sidebar Menu. If you see the name of the server in the bottom left of the screen, you are set to go. The program will take you directly to the System Setup Screen if it is not connected.
If You Are Not Connected To The Document Server, Click HERE.
Step 2: Check That Your Scanner Is Selected
You have to tell Imaging Assistant which scanner you want to use. The scanner must either be attached to your computer workstation from which you are scanning, or your computer must have access to the scanner controls.
If your scanner is not shown at the top of the screen, you will need to click on the Tools Icon ![]() to go to the Scanner Setup Screen.
to go to the Scanner Setup Screen.

Scanner Name And Resolution
Click HERE to select or change the scanner selected.
See Also
Checking Scanner Compatibility
|
Use the Scanner's Native Interface for mixed mode (some duplex and some simplex documents) unless you are just doing quick one sided scanning. |